Setup
Setting up monitoring takes three steps: create a project, add a website to it, and tell Wygard which page types to watch. After that, Wygard checks the pages on schedule and alerts you when something changes.
If the terms project, website and page type are new to you, read Concepts first. It takes two minutes.
1. Create a project
Sign in at 200.wygard.com, open Projects in the left menu and click Add Project. A panel opens on the right.
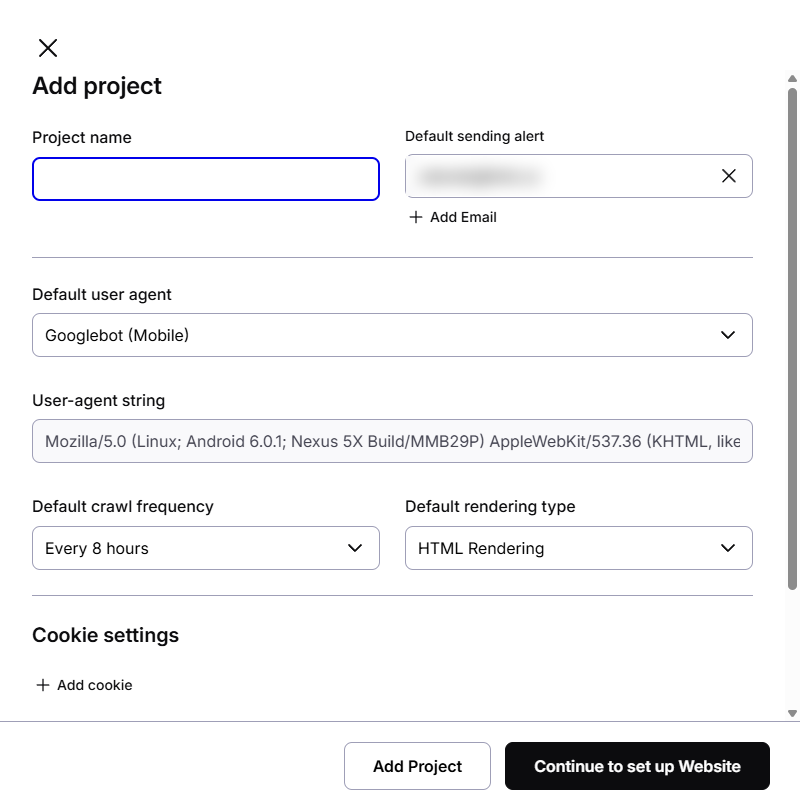
| Field | What to fill in |
|---|---|
| Project name | Anything that helps you find it later, typically the client or brand name. |
| Default sending alert | Where alert emails go. It starts with the email of the account owner. Use Add Email to add more addresses, the cross removes one. |
| Default user agent | The crawler identity Wygard uses when it fetches your pages: Googlebot (Desktop), Googlebot (Mobile), SeznamBot, Wygard, or Custom. The User-agent string below shows the exact string that gets sent. |
| Default crawl frequency | How often the pages get checked: Every 8 hours, Daily, Weekly or Monthly. |
| Default rendering type | HTML Rendering or JavaScript Rendering. |
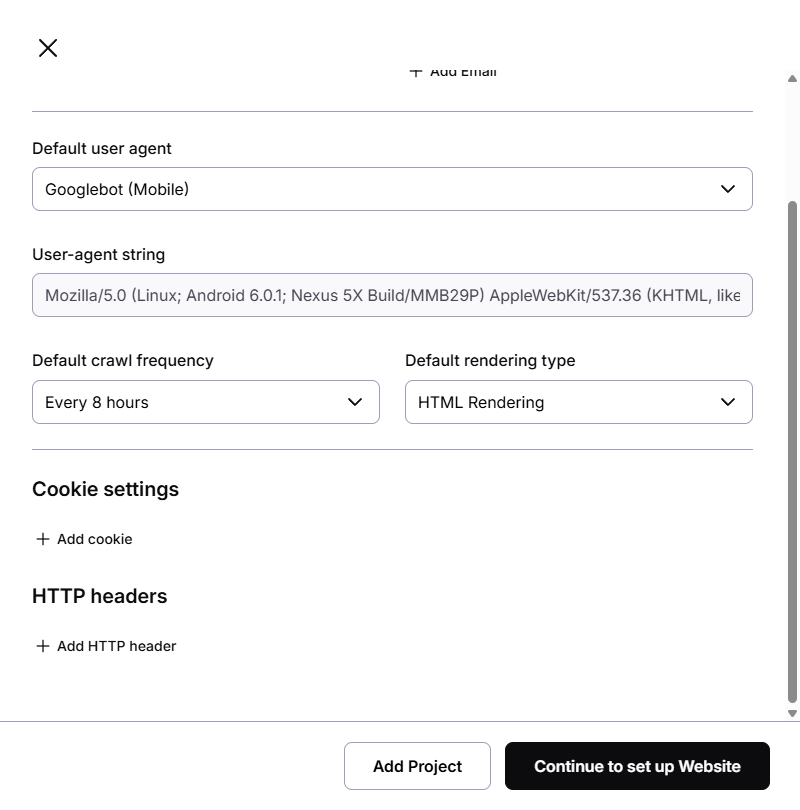
At the bottom of the panel, click Continue to set up Website to go straight to the next step. Add Project only saves the project and leaves you on the project list.
2. Add a website
A two-step guide opens: Add website, then Add URLs.
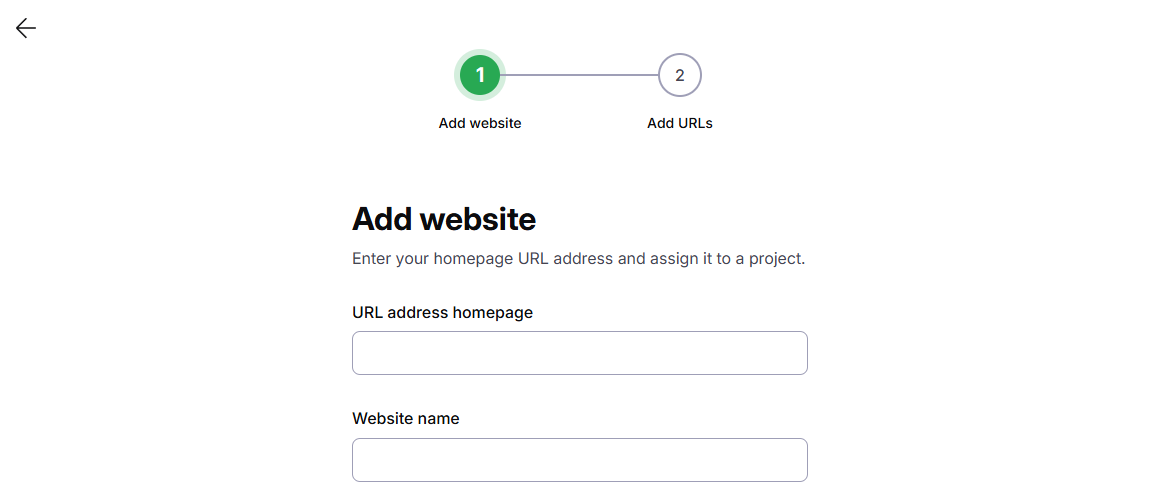
- Enter the URL address homepage, for example
https://www.example.com/. - Website name fills in from the domain. Change it if you like.
- Project is preselected with the project you just created.
- Click Continue.
3. Add page types
A page type is one URL that stands in for a whole template: one category page for all categories, one product page for all products. Wygard watches that URL, and if the template breaks, you see it there. More on this in Concepts.
Your homepage is already on the list as Homepage. For every other template you want to watch, add a row:
- URL Address — the URL of one representative page.
- Page type name (optional) — a label such as Category or Product.
Click into + Add another one to get a new empty row, then type the URL into that row. The trash icon removes a row.
Two shortcuts help with larger sites:
- Add Multiple URLs opens a panel where you paste several URLs at once, one per line, each starting with
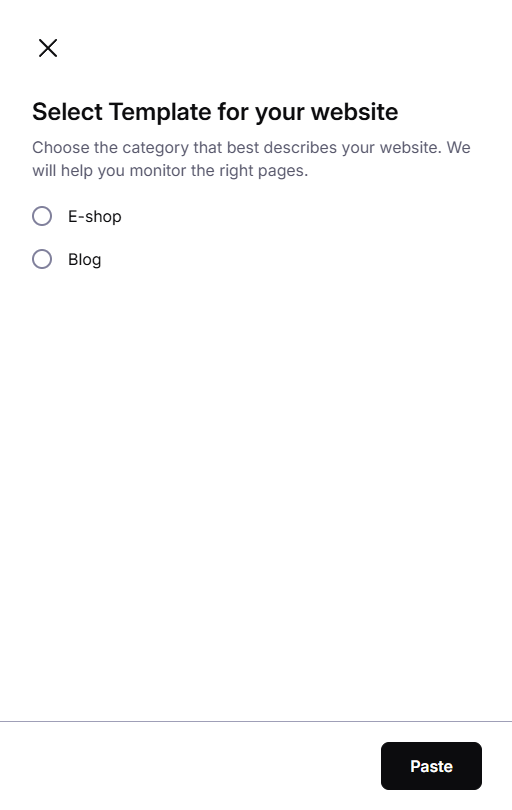
http://orhttps://. Click Paste to turn them into rows. - Select template suggests typical page types for your kind of site. E-shop adds rows for Article, Product and Category, Blog adds a row for Article. You fill in the URLs; rows you leave empty can be removed with remove in the template box.
Which pages to pick
Pick one URL per template that earns organic traffic: category, product, article, blog listing, and any landing page built on its own template. If paginated or sorted versions of a listing are indexable on your site, or you want to be sure they stay out of the index, add one of each (for example page 2 of a category, and the category sorted by price) as separate page types.
The footer shows Added tests against the limit of your plan. It counts the URLs on the list, homepage included.
Advanced settings
Show advanced settings opens the settings of the website you are adding. Besides the website name, user agent, crawl frequency and rendering type, you switch the website-level tests here:
- URL Duplicity Checker
- Site map — with the sitemap URLs to watch and its checks (status code, size and limit)
- Robots — with its checks (status code, sitemap included, max file size, validity of file, content change)
See Tests for what each of them does. Click Save settings to keep your changes; you stay in the guide.
4. Start monitoring
Click Start monitoring. Wygard saves the page types and opens the website detail, where you see every test with its page type, match type, desired value and found value.
Next steps
- Concepts — how projects, websites, page types and tests fit together.
- Editing a test — adjust what a test expects and how strictly it compares.
- Understanding alerts — what to do when a test fails.